So you want to use the Shopify and have decided to use the Brooklyn theme.
Let me tell you two things I realized when I first started using Shopify a few years ago:
- There were plenty of free themes that I was going to choose from
- It’s easy to view the demo but not as easy to replicate
Unfortunately, in my case, I was only choosing a theme because of the demo I saw.
My plan was to just replace images and text on the demo with my own stuff and hit the ground running.
Soon I realized, after spending many long nights working to literally replicate the demo but I knew that it could have been much easier.
Remember this is when I first started using Shopify.
Fast forward to a few weeks ago, I was recreating a demo for a client and I did everything in just about an hour.
One. Hour.
Okay- so what’s the point, Mike?
Well, I’ve decided to make your life easier.
In fact, I wanted to give you 2 ways to make it easier.
First, I created the step-by-step tutorial (below) that teaches you how to duplicate a demos.
These tutorials would teach you the exact steps you would need, down to the specific images, to make the demo.
This option would save time (days) for any new Shopify user, because I’ve already overcome the nuances of the platform.
But that was enough.
So I came up with an alternative option that would save even more time.
I’m not going to lie, I’m a bit hesitant in offering this because my time is limited. But, I’ve decided to go through with it anyways.
For a limited time, I will recreate a theme for you and I’m going to do it for free.
What’s the catch?
First of all, I’m only going to just focus on a few themes to start with; the Brooklyn Theme being one of them.
Secondly, I truly want to help businesses get started as fast as possible without going through the challenges they face when opening their shop.
And finally, probably the biggest reason, I want to be the person you call when you have any questions.
I promise there are no strings attached.
You don’t need to use my services when it comes to customizing your site.
However, I’m hoping that setting up your store is a small sign of good faith that I can be trusted when creating your business.
Again, I don’t know how long I can keep this offer up due to time restrictions, but I really think it could help a lot of businesses out there.
Alright, so I’ll stop the yapping now, but let me know if you are interested or have any questions. If I’m not making videos or writing new posts, I’m here to help!
Let’s start with the tutorial.
I’ll start from the very beginning, but skip to any section below:

ABOUT MEDIA MIKE
I’ve been helping businesses (small and big) establish themselves online over the past 15 years, for myself and others. Now I want to share what I’ve learned.
Installing the theme
The first thing we want to do is visit the theme store. To do this we should first navigate to the Shopify theme store.
- Log into the Shopify admin dashboard
- Under sales channels, click on Online Store
- Then under Themes section, scroll down and click “Visit Theme Store”
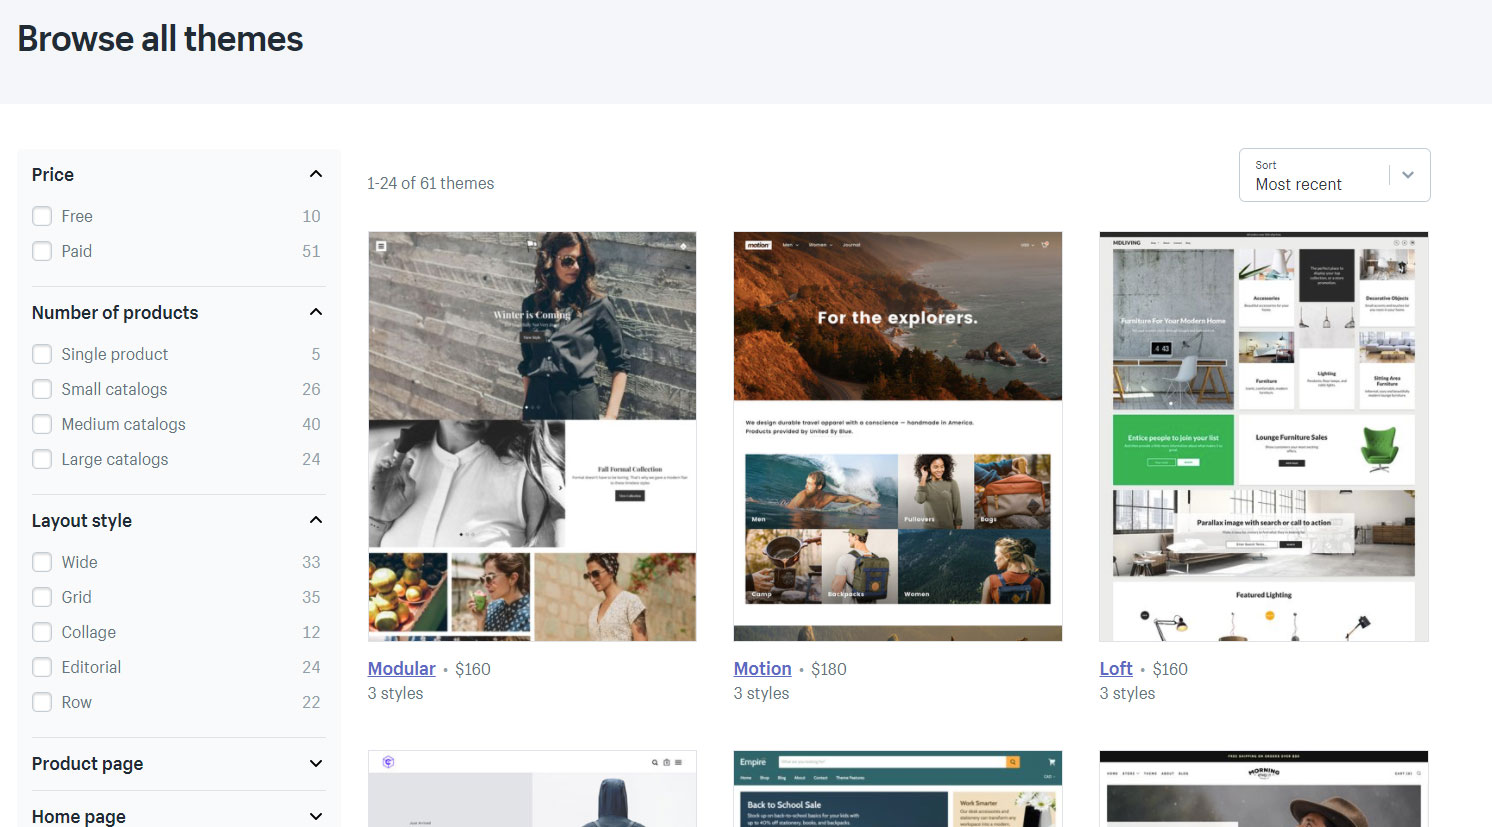
- You should be on the Shopify Theme Store page now. Click on “All Themes” navigation menu at the top
- Select the Free filter on the left

- Then scroll down until you the Brooklyn theme. Click on the link to get to the Brooklyn theme page.
- You’ll see that there are two styles. We are going to keep it as “Classic” and click the “Install theme” button.

- Then click the “Publish as my store’s theme”

- You’ll get a confirmation that the theme was installed, then click “Go to your Theme Manager”

Adding a collection
Before adding in products, we are going to add in a few collections that we will be using in our store. You don’t have to do it in this order but, since we are basing this on the Brooklyn theme demo, we already know what we want to add.
Collections are essentially groups of your products within your Shopify store. Some common uses of collections can be grouping colors or sizes, categories (mens, womans, kids), and things that are on sale.
Let’s add the categories shown on the demo site for the Brooklyn theme.
- Starting from the Shopify Admin dashboard, go to the Products section on the left menu and click on Collections”

- Here, I’ll add in my Title “MENS”
- Then I’ll upload my Collection image: mens-large_1944x.jpg
- Change the Theme template suffix to ‘collection.image’

- Click the “Save collection” button to save.
- Repeat the same steps for the remaining categories (womens, home, outdoor, bags, etc.)
As a side note, you can automatically assign collections to your products by defining Conditions.
You have the option of assigning collections manually, which is what we’ll do in this tutorial, but you can define some rules (e.g. product title contains “men”) and everything will be applied automatically.
This is a great option for stores that have hundreds of products that they are managing.
Adding a page
The first thing we want to do is visit the theme store. To do this we should first navigate to the Shopify theme store.
- From the Shopify Admin page, click “Online Store” under SALES CHANNELS.
- Click on Pages
- Click on the Add page button

- Add the Title of the page
- Next, we are going to add in content for a few pages
About Us
- Click the ‘Add page’ button from the Pages section, under the Online Store in the SALES CHANNEL section of the Shopify admin
- Add in the page title: About us
- The About Us page has an image but begin by adding in the text:
Our story began in 2001 in a small studio in the middle of nowhere. With only one desk and next to no free time, our brand was born. Our passion for unique design and collaboration brought our vision, and products, to life.
- Once the text is in place, we’ll add the image by clicking on the Insert image

- After uploading the image (About/page-boot.jpg), update the size to 1024×1024

- Click the ‘Insert image’ button
- After inserting the image, click the alignment button and select “Center align”

- Click the “Save”
Return Policy
- Click the ‘Add page’ button from the Pages section, under the Online Store in the SALES CHANNEL section of the Shopify admin
- Add the page title: Return policy
- Add in the text. You can get this text from the demo page:
RETURNS
Our policy lasts 30 days. If 30 days have gone by since your purchase, unfortunately we can’t offer you a refund or exchange.
To be eligible for a return, your item must be unused and in the same condition that you received it. It must also be in the original packaging.
Several types of goods are exempt from being returned. Perishable goods such as food, flowers, newspapers or magazines cannot be returned. We also do not accept products that are intimate or sanitary goods, hazardous materials, or flammable liquids or gases.
Additional non-returnable items:
* Gift cards
* Downloadable software products
* Some health and personal care items
To complete your return, we require a receipt or proof of purchase.
Please do not send your purchase back to the manufacturer.
There are certain situations where only partial refunds are granted: (if applicable)
* Book with obvious signs of use
* CD, DVD, VHS tape, software, video game, cassette tape, or vinyl record that has been opened.
* Any item not in its original condition, is damaged or missing parts for reasons not due to our error.
* Any item that is returned more than 30 days after delivery
REFUNDS (IF APPLICABLE)
Once your return is received and inspected, we will send you an email to notify you that we have received your returned item. We will also notify you of the approval or rejection of your refund.
If you are approved, then your refund will be processed, and a credit will automatically be applied to your credit card or original method of payment, within a certain amount of days.
LATE OR MISSING REFUNDS (IF APPLICABLE)
If you haven’t received a refund yet, first check your bank account again.
Then contact your credit card company, it may take some time before your refund is officially posted.
Next contact your bank. There is often some processing time before a refund is posted.
If you’ve done all of this and you still have not received your refund yet, please contact us at [email protected].
SALE ITEMS (IF APPLICABLE)
Only regular priced items may be refunded, unfortunately sale items cannot be refunded.
EXCHANGES (IF APPLICABLE)
We only replace items if they are defective or damaged. If you need to exchange it for the same item, send us an email at [email protected] and send your item to: 150 Elgin Street Ottawa Ontario CA K2P 1L4.
GIFTS
If the item was marked as a gift when purchased and shipped directly to you, you’ll receive a gift credit for the value of your return. Once the returned item is received, a gift certificate will be mailed to you.
If the item wasn’t marked as a gift when purchased, or the gift giver had the order shipped to themselves to give to you later, we will send a refund to the gift giver and he will find out about your return.
SHIPPING
To return your product, you should mail your product to: 150 Elgin Street Ottawa Ontario CA K2P 1L4.
You will be responsible for paying for your own shipping costs for returning your item. Shipping costs are non-refundable. If you receive a refund, the cost of return shipping will be deducted from your refund.
Depending on where you live, the time it may take for your exchanged product to reach you, may vary.
If you are shipping an item over $75, you should consider using a trackable shipping service or purchasing shipping insurance. We don’t guarantee that we will receive your returned item.
Contact Us
This page is a little different and requires us to add some code. Let’s go through it step-by-step.
- Click the ‘Add page’ button from the Pages section, under the Online Store in the SALES CHANNEL section of the Shopify admin
- Add the page title: Contact us
- Add in the image by clicking on the Insert image

- After uploading the image (About/page-boot.jpg), update the size to 1024×1024

- Click the ‘Insert image’ button
- After inserting the image, click the alignment button and select “Center align”

- In the top right of the editor you’ll see a Show HTML (<>) button. Click this button

- Copy and paste this code into the form, after the image code.
This is the image code:
<p><img src=”//cdn.shopify.com/s/files/1/2279/8629/files/page-contact_1024x1024.jpg?v=1506960634″ alt=”” /></p>
This is the code to copy and paste:
<div class=”grid medium-down–text-center”>
<div class=”grid__item large–one-half”>
<p><a href=”http://maps.google.com” target=”_blank” class=”text-link” rel=”noopener noreferrer”>1124 Queen St W.</a><br />Toronto, Canada<br />416 967 1111</p>
</div>
<div class=”grid__item large–one-half large–text-right”>
<p><em>Mon – Fri, 10am – 9pm<br />Saturday, 10am – 10pm<br />Sunday, 11am – 6pm</em></p>
</div>
</div>
<h2 style=”text-align: center;”>GET IN TOUCH</h2>
- Change the Template suffix from page to page.contact

- Click the “Save”
Adding a blog
One of the great things about Shopify is that they offer you to add in a blog for your website. As you might have noticed in my past videos and articles, a blog is a great way add more content so that people can find you on the search engine, not to mention that it’s a great way to keep your customers updated on your business.
Create a Shopify Blog
- To begin adding a blog, click the ‘Blog posts’ link from the Pages section, under the Online Store in the SALES CHANNEL section of the Shopify admin

- Then click the Create blog post button
- Add in your blog title. In this example, we’ll enter “The Big Launch”
- Now, let’s add in an image for the blog. Click the insert Image icon.
- Upload the image
- Select the image
- Specify the size (for this example I’ll choose 1024×1024
- Then we’ll copy in the text for the blog:
After much planning, decorating, sourcing, packaging, pricing, and more, it was time to launch. Celebrating with a small party for friends, family, and everyone in between, we finally shared our brand and products with the world. There’s no one way to start a business, so it was great to see everyone that helped us find our own way here in one room with us.
Our launch was the perfect time to showcase our new collections and share some of our stories.
Each collection and product is created using the finest materials, and designed exclusively for you. Our signature collection will soon grow into seasonal collections, and we’re hoping to offer more and more unique products as we get bigger and better.
“There’s no one way to start a business, so it was great to see everyone that helped us find our own way in one room with us.”
We just want to say thanks to everyone who has supported us on our journey, and we can’t wait to share our new products and ideas with you very soon. Stay updated on our upcoming news and events here, or follow us on Instagram and Facebook. See you soon!
- Let’s format the quote to the text you just added in. First copy the text (“There’s no one way….with us.”)
- Then from the Formatting drop down, select Blockquote

- Click the Save button at the bottom right of the page.
Activate Blog Comments
Now that we have our post in place, let’s activate comments for our blog.
- To begin adding a blog, click the ‘Blog posts’ link from the Pages section, under the Online Store in the SALES CHANNEL section of the Shopify admin

- Once you’re on the Blog posts page, click Manage blogs towards the top of the page (under the heading)

- Click on the Blog name to edit the Blog.

- Change the Comment settings to either moderation or automatically published

- Click the Save button.
Adding a product
- Starting from the Shopify Admin dashboard, go to the Products section and click on “All products”

- Then click the “Add product” button
Adding in the product title
Add in a product description
This box is what they call a WYSIWYG (wiz-e-wig), which is short for What You See Is What You Get. I’m going to add in the description
Adding Product images
Upload your image(s). NOTE: Shopify is really great with SEO already, but I like to be as descriptive as possible in the file name of images. So, if you are uploading a specific style of shirt or hat, make sure to include that. For example, brandname-tshirt-cheetah-print.jpg.
Also, keep in mind that these images are ordered in priority from left to right and down. You can drag around the images as you please.
For example, the featured image for the example below is the backpack itself, as opposed to the person wearing the backpack

Adding the product pricing
The pricing defined here will trickle down to any of the variants that you create for the products.
You’ll notice that there are two fields: Price and Compare at price.
The Price field is the cost of the item to your customer.
The ‘Compare at price’ is the original price, which can also be left blank if you prefer. So, if you wanted to show an original price of $100 and the new price of $75, then you would set the ‘Compare at price’ as $100 and the ‘Price’ as $75.
Adding product inventory
Shopify makes it really easy to keep track of your inventory (i.e. the number of products that you have to sell). You have the option of Shopify either keeping track of this for you or you can track it yourself.
If Shopify is tracking your product inventory, your customers will know immediately if you have a product available to buy. If there are no more products available to sell, your customers will see that the items are ‘Sold out’.
The steps below show how you can setup your inventory in Shopify, however if you want to keep track of inventory on your own, change the ‘Inventory policy’ drop-down menu to be “Don’t track inventory.”

- To begin adding the inventory begin my adding in a SKU and a Barcode.
- Make sure “Shopify tracks this product’s inventory” is selected in the Inventory policy dropdown window.
- Add in the quantity
- Optionally, you can allow customers to purchase the product when it’s out of stock. I personally don’t do this with my stores, but if you are keeping a close eye on the inventory then this might be something to consider.
Shipping Calculations
Obviously this only applies to certain products (i.e. not digital downloads), but this is where you can update the shipping information for your product. We’ll be going through this at a later time, but a few things to consider when setting these settings are:
- Find the average shipping rate for your store. Knowing this will help you pick a shipping courier for your products
- Once you’ve determined the average shipping rate for your store, you can begin offering flat rates to your customers. This sets expectations for people visiting your store and could help you finalize the same.
- Consider offering real-time shipping quotes for your customers. This enables customers to essentially pay what you pay for shipping. This is a huge benefit because a high shipping cost can often deter your customers from buying a product
Adding product Variants
Product variants can be used when you have different variations of the same product. For example, if you had a different color shirt and/or a different size, you would create variants accordingly.
In this example, we are adding in shoes, so I will create a variant for each size of shoe according to what’s seen in the demo site.
Note: the prices, SKU’s and barcodes specified in the sections above will auto populate here, so it might be easier to define everything first before creating variants
- Click the ‘Add variant’ link
- By default, the Option name is ‘Size’, so I’ll leave that as is.
- Next I’ll add in the Option values, which are all the variations that fall under size. The shoe sizes in this case are 7, 7.5, 8, 8.5 and so on until size 12. As you type in one size, use the “,” (comma) to separate it from the size itself.
- As you add in the variants, you’ll notice that you can ‘Modify the variants to be created’. This is where you can specify the Price, SKU, and Barcode. As mentioned above, this information will be pre-populated for you if you added it in before creating variants
- Specify the inventory. You’ll need to do this to start with but, if Shopify is managing your inventory for you, Shopify will automatically update this as you start making sells.
Assigning Collections
As mentioned above in the collections section of the tutorial, Shopify can add collections automatically. However for the purpose of this tutorial and demo, we’ll be adding it manually. You can assign more than one collection to the product and remove a collection by clicking the ‘x’ link next to the respective collection.
Customizing the theme
Store Customization page
To get to the customization page
- From the Shopify Admin page, click the Themes link under the Online Store in the SALES CHANNELS section
- Click the Customize button
Update the Header
Announcement Bar
By default, the announcement bar is automatically added into your Shopify store. I personally love the announcement bar and I think it’s a great way to let your customers know what’s going on with your store, like special sales, featured products, and (my favorite) shipping discounts.
That said, I’m going to show you how to remove the announcement bar at the top of the website because it doesn’t exist in the Brooklyn Classic theme demo.
- To remove the announcement bar, click on the Header section from the customization page

- From the Header settings page, scroll down until you see the ANNOUNCEMENT BAR section and uncheck “Show announcement” and “Home page only”
- Click save
Note: if you wanted to keep the announcement bar, just update the ‘Text’ field and paste in a Link if applicable. You can also change the Bar and Text of the announcement, by clicking on the color for the corresponding item.
Updating the Logo
There are two logo images we can upload: the regular image and the inverted logo. The inverted logo is used when the background is dark, otherwise the regular image is normally black/dark.
- From the customization page, click on the Header section
- From the Header settings page, click select image.
- Upload the image (if it’s not already in your image library) by clicking the plus sign. Then select the file named “logo_180x_2x_180x.png”
- Click select
- Then we’ll upload the Inverted logo, by clicking Select image.
- Upload the image with the file named: [email protected]
- Click save
Update the Main Menu
There are 2 ways you can update the navigation menu. The first step is through the Customization page
- From the customization page, click on the Header section

- Click on Edit menu

The other way to update the navigation menu is from the Shopify Admin page.
- Under SALES CHANNELS, click Online Store.
- Then click on the Navigation menu and you should see the Main menu
As you will notice, both ways bring you to the same page.
Great, now let’s do a few house keeping things by deleting the pages that were automatically created with the store.
- From the Navigation page, click on the Main menu link

- To delete the pages, click on the trash button next to both pages.

- You’ll be asked to confirm the removal of the menu item. Click the Replace icon.

- Once the items have been removed, you should now see a message stating that “This menu doesn’t have any items”

- Click the “Add menu item” link
- You should see a pop-up window asking you to enter in the Name. Start by adding in the name: “MENS”
- Then you’ll search for the Link. Click into the search box, and select Pages. Note, you should have already added in Pages for your site in the previous step. If you have not done so, do that first and come back to edit the navigation menu.

- Select the page, and then click the “Add” button.
- Do this for the remaining pages on your site (Womens, Outdoor, etc)
- Click the “Save” button when you are done
Now go visit your store to check out the header menu, and you should see that the pages were added!
Update the footer
Adding Pages
- Under SALES CHANNELS, click Online Store.
- Then click on the Navigation link
- Once on the Navigation page, click on the Footer menu link

- Click on the ‘Add menu item’ link
- Add in the Name of the page (Return policy, Blog, Contact us, About us)
- Click on the link search box
- Choose the corresponding link for the page

- Click Add
Add Social links
To get to the customization page
- From the Shopify Admin page, click the Themes link under the Online Store in the SALES CHANNELS section
- Click the Customize button
- Click on the Footer section
- Click the General Settings drop down window.
- Fill in your profile links for your social media accounts
- Click the “Save” button
Adding Payment Icons
Payment icons seem are a great way to bring trust to your store. Payment icons are automatically added into your footer when a Payment Processor.
- To add a Payment processor, start by clicking the Settings icon at the bottom left of the Shopify Admin page
- From the Settings page, click on Payments

- Click the Add a provider button in the Accepted credit cards section

- Make sure that Shopify Payments is selected

- Then click Continue.
There are a few more steps to complete the process, but take a look at the footer and you should now see the Payment icons
Updating the home page
Upload Slider Images
Upload the first image for the slider
- From the customization page, make sure you are on the Sections tab. Then click Slideshow

- From the Slideshow settings, click on the arrow for the first slide. Then click select Image

- Upload the image “hero_slide_1_4472x.jpg” (you can find this file in the Shopify Brooklyn Theme Sample file if you haven’t already downloaded it)
- Once uploaded, click on the image and click the “Select” button on the bottom left. You should now see your image, with the Change, Edit and Remove buttons below.
- Then, we are going to change the Text color to Light.
- Change the text in the Subheading text to say “AMERICA’S FINEST”
- And update the Heading text to say “Rugged Outwear”
- Change the Button text to say “SHOP MENS”
- Update the Slide link and choose Mens Collection
- Click Save
Repeat the same steps as above for the second slide
- Click on the second Slideshow dropdown
- Upload the image “hero_slide_2_4472x.jpg” (you can find this file in the Shopify Brooklyn Theme Sample file if you haven’t already downloaded it)
- Once uploaded, click on the image and click the “Select” button on the bottom left. You should now see your image, with the Change, Edit and Remove buttons below.
- Then, we are going to change the Text color to Light.
- Change the text in the Subheading text to say “NEW FOR 2016”
- And update the Heading text to say “Spring Collection”
- Change the Button text to say “SHOP WOMENS”
- Update the Slide link and choose Womens Collection
- Click Save
Edit the Rich Text
- From the customization page, make sure you are on the Sections tab. Then click Rich Text
- Click the Rich text dropdown menu
- Add/Edit the text
Update the Collection List
- From the customization page, make sure you are on the Sections tab. Then click Collection list

- From the Collection list settings, click and update the Collection

- Click the Search collections text box and select the respective collection

- Click the “Save” button when you are done making changes
Update the Featured collection
- From the customization page, make sure you are on the Sections tab. Then click Featured collection
- Under the Featured collection section, choose a collection under the drop-down menu

- Click the Save button